My Home Office/Walk-in Closet/Sanctuary
So one of the perks of moving was being able to turn an extra bedroom into what I have called my sanctuary for the past 10 months.
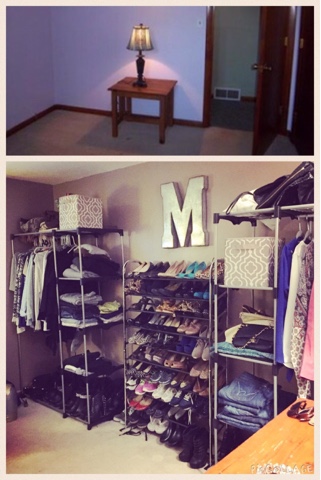 It was a dream of mine to be able to have a space like this - a space to fit my entire wardrobe (without having to switch seasonally), a space to work, and a space to just chill. I am beyond grateful to have had the opportunity to enjoy it - now, I gladly am starting the process of converting the space to a nursery. I am sad to see it go but that means that I will just have to work to build a new space - somewhere in this house ;-)
Before it's a bedroom to Baby M I thought, 'why not preserve this golden memory forever with a blog post?' Alas, we are here.
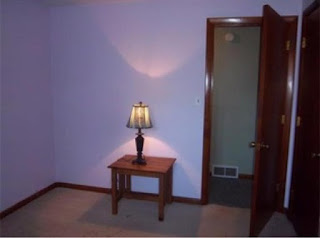
This spare bedroom started off with light purple walls but essentially was a blank canvas for my imagination to run free.
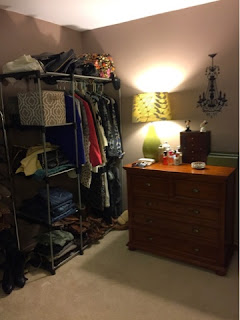
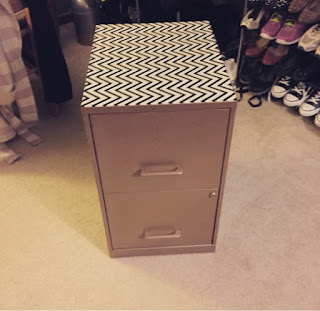
I was able to repurpose an old dresser and wardrobe and I purchased a new desk, clothing/shoe racks and worked with an old filing cabinet that I provided a quick little makeover to!
I'll start by saying Amazon.com is my best friend. I am a long-time Prime member and always will be. I could not have done this closet on my budget had I gone to the Container Store or Home Depot - no offense to either but it just wasn't in my budget!
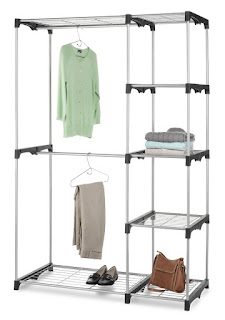
To start, I ordered two of these fantastic clothing racks - HIGHLY recomended. The bestie and I put them together in no time but someone can easily assemble alone. What's better than that? The fact that they were under $40 a pop!


Every item arrived within a couple of days (thanks to my Prime membership and FREE shipping) and was easy to assemble by myself. The shoe rack goes together as the top and bottom (two sections) and I now have separated the two sections: I am using the bottom in my closet that I have to share with the hubby (dumb) and I let my eldest daughter use the top half for her shoes - perfect solution to downsizing! I also don't use the casters so you can save for another DIY project (speaking of...where did I put those...)!
For my desk - I went to Ikea. I am pretty sure it was the very first item I ever purchased from Ikea that I had to put together. Yes - it was annoying, yes - the directions are without a single word, yes - I had wine. But even though I was originally overwhelmed by the directions, the desk went together quite nicely! The desk is the perfect size for a smaller space and spacious enough to fit my printer, laptop, a million post-its, and five cups of coffee. Another steal at $80! I wanted to find an old desk and refinish but it was winter and cold and I didn't have time!

Random decor was from Hobby Lobby and Christmas Tree Shops - two of my favs!


Before it's a bedroom to Baby M I thought, 'why not preserve this golden memory forever with a blog post?' Alas, we are here.

This spare bedroom started off with light purple walls but essentially was a blank canvas for my imagination to run free.
I was able to repurpose an old dresser and wardrobe and I purchased a new desk, clothing/shoe racks and worked with an old filing cabinet that I provided a quick little makeover to!
I'll start by saying Amazon.com is my best friend. I am a long-time Prime member and always will be. I could not have done this closet on my budget had I gone to the Container Store or Home Depot - no offense to either but it just wasn't in my budget!
To start, I ordered two of these fantastic clothing racks - HIGHLY recomended. The bestie and I put them together in no time but someone can easily assemble alone. What's better than that? The fact that they were under $40 a pop!

I then purchased one shoe rack ($42) and one adjustable garment rack ($15) for longer items - all Whitmor and all from Amazon.


For my desk - I went to Ikea. I am pretty sure it was the very first item I ever purchased from Ikea that I had to put together. Yes - it was annoying, yes - the directions are without a single word, yes - I had wine. But even though I was originally overwhelmed by the directions, the desk went together quite nicely! The desk is the perfect size for a smaller space and spacious enough to fit my printer, laptop, a million post-its, and five cups of coffee. Another steal at $80! I wanted to find an old desk and refinish but it was winter and cold and I didn't have time!

Lastly, was my filing cabinet. How I managed all these years of my life not owning a filing cabinet is beyond me because it was full instantly. I picked up this cabinet from one of my good friends who was clearing out some items (free) and I bought a roll of chevron contact paper and a can of gold spray paint that was lying around in my husband's workshop and VOILA!!!


So if you have any questions about how I turned this spare room into my little oasis, let me know! Stay tuned for the nursery transition!


Comments
Post a Comment